
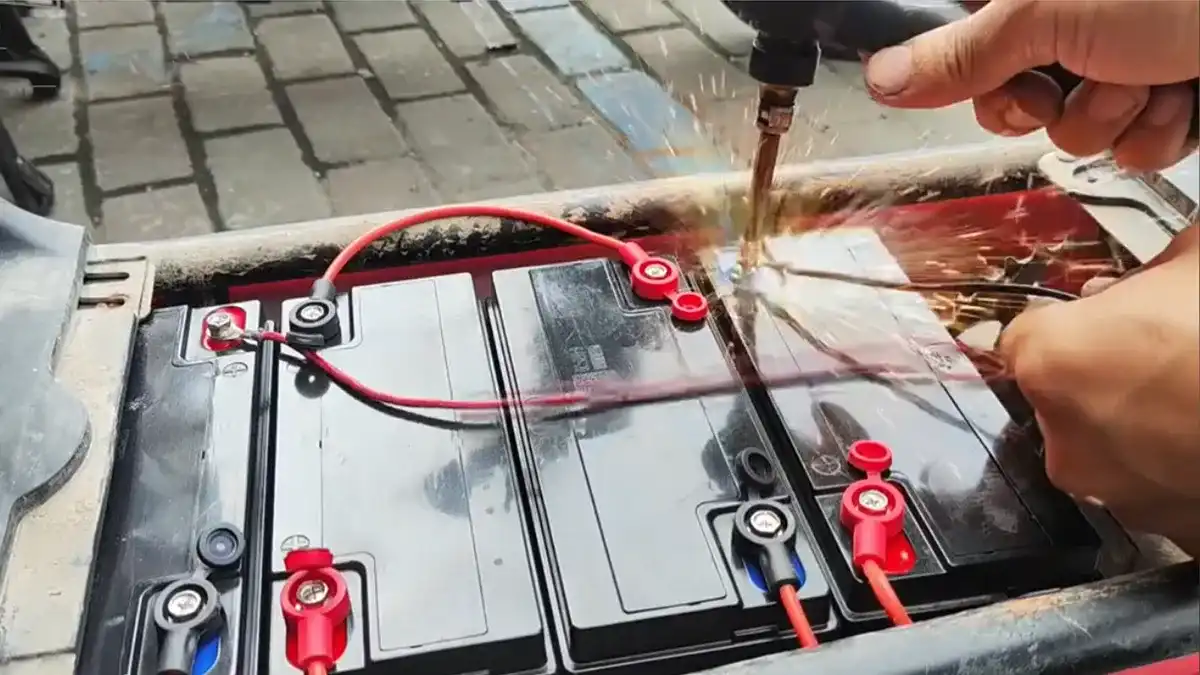
Electric Bicycle Battery Fault Repair Experience: Testing, Diagnosis, and Repair Case Analysis
Battery faults are among the most common problems on electric bicycles. Most battery failures show up as short charging time, rapid voltage rise, short riding range, or abnormal overheating, and they usually trace back to the battery itself, the charger, the controller, or the way the battery is used and stored. This guide covers battery testing and fault diagnosis, the main causes of battery failure, troubleshooting methods, and 22 real repair cases. It begins with visual inspection, voltage testing, relief valve inspection, airtightness testing, and capacity testing, then explains how to diagnose common faults such as sulfation, active material shedding, self-discharge, short circuits, deformation, and leakage. Because battery work involves acid, high current, and stored energy, always follow the safety precautions in each section before opening, charging, or repairing a battery.
Testing and Fault Analysis of Electric Bicycle Batteries
1. Battery Testing and Fault Diagnosis
1.1 Battery Fault Detection
Among the major components of electric bicycles, batteries have a relatively high failure rate. Battery testing primarily includes: ① visual inspection; ② voltage testing; ③ inspection of the battery’s relief valve; ④ internal inspection of the battery; ⑤ inspection of the battery’s airtightness; ⑥ inspection of the battery’s capacity, etc.
The specific testing methods are as follows:
a. Inspect the exterior. Generally, check whether the battery is deformed, damaged, leaking, or contaminated.
b. Voltage testing. First, measure the battery’s total voltage, then check the voltage of each individual cell one by one and verify that the connections are secure.
c. Inspection of the battery relief valve. First, remove the top cover and check for fluid leaks around the relief valve; then, remove the relief valve to check for sticking, looseness, or damage.
d. Check for airtightness. Use a pneumatic testing device (i.e., a manometer) to inflate the battery and verify that the pressure is between 30 and 40 kPa and that the pressure reading is stable.
e. Check the battery’s capacity. Test this by discharging a fully charged battery (at a discharge current of 5 A).
f. Inspect the battery’s interior. Open the battery to check whether the electrolyte level is correct, or use a wooden stick to test it.
g. Check the voltage of each battery cell. Use a metal wire to contact the busbars inside the battery and measure whether the voltage of each cell is normal and whether there are any short circuits or open circuits.
1.2 Simple Diagnostic Methods for Battery Failures
Simple diagnostic methods for battery failures are as follows: First, inspect the battery’s exterior; the casing should be free of cracks, deformation, and leaks; the surface should be clean, the terminals free of corrosion, the wire insulation in good condition, and there should be no self-discharge; battery connections should be secure and free of damage, and the ground connection should be firm.
Next, turn on the headlights to check. If the light is bright white, the battery is functioning normally; if the light is dim and reddish, the battery capacity is insufficient.
After the inspection, connect the power supply and apply a load to the electric bicycle motor. If the motor runs normally and the light dims slightly but remains bright, the battery is performing well; if the motor runs weakly and the light is very dim, the battery is deeply discharged and requires immediate charging; if the lights turn dark red when the motor is loaded and the motor stops immediately when started, this indicates that the battery has been discharged beyond its limit or that the plates are severely sulfated.
Next, perform a charge-discharge test. After the battery is fully charged, the voltage of each cell should be 13–14 V; voltages exceeding this range are abnormal. After the battery is fully discharged, the voltage of each battery should be 11.60V or higher; batteries with a voltage below 11.60V are considered defective.
Finally, conduct an on-vehicle operation test. If the driving range meets requirements and the consistency of the battery voltage after discharge is good, the battery is considered acceptable. If the driving range is short and the consistency of the battery voltage is poor, the battery is considered not acceptable.
A multimeter can also be used to measure whether the battery’s voltage and current meet the standards; if they do not, the battery is damaged.
2. Troubleshooting Approach for Battery Failures
Battery failures typically manifest as short charging times, with the voltage rapidly rising to the charge termination voltage; and short discharge times, with the voltage rapidly dropping to the discharge termination voltage. Common faults include: reduced capacity, insufficient charging, and abnormal battery overheating.
2.1 Causes of Battery Failures
The main causes of battery failures include: quality issues with the battery itself, substandard chargers, malfunctioning controllers, and human error.
a. Battery-related causes. First, quality issues, such as poor charge/discharge endurance; poor-quality active material in the internal plates, leading to accelerated self-discharge; increased electrolyte concentration caused by water evaporation, which corrodes the plates, causing severe sulfation and reducing the battery’s ability to charge and discharge; large, rapid variations in battery performance.
b. Charger-related causes. The use of substandard chargers, which cannot charge according to the battery’s required specifications—particularly overcharging, which damages the plates; undercharging, which causes rapid sulfation of the plates; and the inability to adjust current and voltage in real time according to different charging stages. For nickel-based batteries, excessive charging current, excessively high internal temperatures, and a lack of protective functions can burn through the separators, causing a short circuit between the positive and negative terminals.
c. Controller-related causes. Substandard controllers fail to regulate discharge; the lack of undervoltage protection leads to frequent over-discharge of the battery, causing excessive sulfation of the active material on lead-acid battery plates and overheating due to over-discharge in nickel-based batteries.
d. Human factors. Failure to recharge promptly after use, irregular charging during storage, and abnormal environmental conditions during storage. Overuse, overcharging, and careless maintenance are all major causes of battery failure.
2.2 Troubleshooting Methods
a. Avoid overcharging or over-discharging the battery, and recharge it promptly. If the battery is stored for an extended period, recharge it periodically.
b. Check the controller’s undervoltage protection function. If this function is faulty or absent, the controller should be repaired or replaced.
c. Measure the charger’s cut-off voltage. If the charger fails to maintain a constant voltage upon reaching the cut-off voltage—and the voltage continues to rise, preventing the charging process from stopping—it should be repaired or replaced immediately.
d. The battery itself is faulty. Investigate the situation, identify the cause, and perform repairs.
2.3 Symptoms and Causes of Common Faults
a. If the battery cannot be charged, has no current output, and displays a high voltage, this indicates an open circuit in the battery.
b. If the battery voltage is lower than normal, and the voltage rises only slightly or with difficulty during charging, and remains below normal even after the battery has been left to rest for 1 hour following a full charge, this indicates an internal short circuit.
c. If, when discharged at the normal rate, the battery’s capacity is significantly lower than that of a normal battery; if, during charging, the battery begins to gas early, generates internal heat, and exhibits a very low charging current while the voltage rises rapidly—reaching up to 2.9 V per cell—but the discharge voltage drops immediately below 1.8 V per cell, this indicates that the battery plates have undergone sulfation.
d. After charging, the battery retains very little charge and runs out of power within 1 to 2 days. The primary cause is that the electrolyte’s specific gravity is too high and the electrolyte is not pure enough, leading to severe self-discharge. Distilled water should be added promptly, or the battery should be cleaned and the electrolyte replaced.
e. If the interior of the battery appears reddish or yellowish, or if there is a significant buildup of powder at the bottom, this indicates that the battery was charged at high current for too long or was used for an extended period with insufficient water.
Case Studies on Electric Bicycle Battery Maintenance
Case 01: Decreased Battery Capacity and Poor Charging Performance
Fault Symptoms:
The battery capacity has decreased and charging performance is poor.
Troubleshooting:
The primary causes of this issue lie in three areas: the battery itself, the charger, and the wiring.
- Battery Failure
a. The battery has reached the end of its service life. If the capacity is less than 60% of the rated capacity or falls below the specified standard, the battery should be scrapped and replaced with a new one.
b. A cracked battery casing can easily cause the electrolyte to dry out. It should be repaired as soon as possible to ensure a proper seal; if alkali (or acid) has leaked and accumulated around the terminals, clean the area with a neutral or slightly acidic (or alkaline) solution, then dry it immediately before resealing and repairing. For repaired cracked casings, submerge the battery in water and perform a pressure test through the safety valve; if no bubbles escape from the battery while submerged, the seal is considered satisfactory after repair.
c. Internal short circuit in a single battery cell. If the battery is nearing the end of its service life and is not worth repairing, it should be replaced with a new battery.
d. Performance inconsistencies among individual battery cells. If a battery pack is not functioning normally, it may be due to a problem with one of the individual cells, causing it to operate out of sync with the others and affecting the performance of the entire pack. In this case, the underperforming battery cell should be identified and addressed individually.
If the electrolyte has dried up, neither individual equalization charging nor charge-discharge cycles will restore capacity; add an excess amount of distilled water and overcharge the battery, then drain the excess distilled water and perform charge-discharge cycles to restore capacity. If this is ineffective, the battery should be replaced.
Charger Malfunction: If the charger is not functioning properly, please refer to Chapter 3, “Charger Repair Tips.”
Wiring Faults: During prolonged operation and on rough terrain, electrolyte evaporation, acid immersion, and natural oxidation may cause corrosion, detachment, or poor contact in the battery connection wires, as well as short circuits resulting from crossed and worn wires inside the battery box. These issues are generally easy to detect and resolve through careful inspection. After newly replaced connection wires are soldered to the terminals or secured with nuts, it is best to seal them with acid-resistant resin to isolate acid fumes and prevent oxidation.
Case 02: Battery Overheating
Fault Symptoms:
The battery overheats during use or charging.
Troubleshooting:
Lead-acid batteries generate a small amount of heat whether in use or during charging; this can be clearly felt by touching the battery casing, but abnormal overheating is not permitted. Overheating causes the water in the electrolyte to evaporate and gradually dry up, reducing charging efficiency, deforming the plates, increasing internal resistance, accelerating the oxidation of mechanical components, and burning out the plates or separators—ultimately leading to reduced battery capacity and a shorter service life. Battery overheating can result from two causes: overheating during discharge and heat generated during charging.
- Overheating During Discharge: Battery overheating during discharge is caused by excessive discharge current. The main causes are: ① Excessive load, such as prolonged operation under heavy load; ② Resistance from the vehicle itself, such as issues with axles, bearings, brakes, or friction between the wheels and chassis; ③ Excessively steep gradients; ④ Insufficient battery capacity; ⑤ Motor problems; ⑥ Wiring issues.
Insufficient battery capacity is one of the causes of battery overheating; the capacity should be increased to reduce the operating current. For cylindrical battery packs with remaining space in the battery box, an additional set of batteries can be connected in parallel. Before connecting in parallel, the number of battery cells should be calculated based on the battery pack voltage.
- Heat Generation During Charging. The main causes of heat generation during charging are: ① Battery aging, increased internal resistance, dried-out electrolyte, and internal short circuits; ② Charger malfunctions, such as the absence of a reverse-pulse function to eliminate polarization or the inability to maintain a constant voltage during the later stages of charging, leading to overcharging of the battery.
If the charger lacks constant-voltage and reverse-pulsing functions, the temperature rise can be manually controlled. The specific method is as follows: At the onset of a temperature rise, promptly disconnect the power supply to stop charging; the temperature rise and polarization will then cease on their own, though it takes time for the polarization to subside and be eliminated. Once the temperature has dropped, resume charging, then stop again; repeat this process until the battery is fully charged.
Case 03: Battery Deformation
Fault Symptoms:
The battery is deformed.
Troubleshooting:
Battery deformation typically occurs in three batteries (i.e., a single set) simultaneously, or in one or two batteries within the set.
The specific troubleshooting methods are as follows:
a. All batteries are deformed. First, check the voltage. If it is normal, this indicates that there is no short circuit in the batteries; rather, the deformation is caused by thermal runaway. In this case, check the charger’s charging parameters. If the voltage is too high (above 44.7 V), there is no overcharge protection, or the trickle charge transition current is too low, the charger must be replaced. Batteries with different alloy grids have varying conversion current requirements; generally, batteries with grids made of lead-calcium-tin-aluminum alloy have a lower conversion current of 0.025–0.03C2A, while those with lead-antimony alloy grids have a higher conversion current of 0.03–0.04C2A.
b. One or two batteries in a set (of three) are deformed. The main causes are: ① Inconsistent capacity, leading to overcharging of certain batteries during charging and resulting in deformation. This is caused by a short circuit in a single cell; conduct discharge or self-discharge tests on the batteries; ② Irreversible sulfation of the plates in certain batteries, which increases internal resistance and causes deformation due to heat generated during charging; ③ Reverse connection of battery terminals, resulting in deformation due to heat generated during charging. Check the discharge capacity and self-discharge characteristics of the undamaged batteries; if no abnormalities are found, the issue does not lie with the batteries.
Therefore, add as much electrolyte as possible while ensuring there are no leaks to prevent thermal runaway; internal short circuits or micro-short circuits in the battery should be avoided as much as possible; during use, store the battery fully charged to prevent deep discharge; strictly inspect the charger to prevent overcharging, and when charging at high temperatures, ensure the battery is well ventilated.
Case 04: Battery Leakage
Fault Symptoms:
The battery leaks electrolyte.
Troubleshooting:
The main causes of battery leakage are: ① Poor sealing between the top cover and the bottom tray, or leakage caused by cracks in the sealing compound due to impact; ② Acid seepage and leakage from the relief valve; ③ Acid seepage and leakage at the terminal connections; ④ Acid seepage and leakage from other areas, etc.
The specific troubleshooting procedures are as follows:
First, inspect the exterior to locate the source of the acid seepage or leakage. Then, remove the cover plate and check the area around the relief valve for signs of leakage. Alternatively, wipe the surface of the leaking battery clean, invert it by 90° so that the terminals point horizontally, and let it sit for 24 to 48 hours before inspecting the leak location. Next, open the relief valve and check the interior of the battery for flowing electrolyte.
If no abnormalities are found after the above inspections, perform an airtightness test: submerge the battery in water, inflate it, and pressurize it to check for bubbles escaping from the battery; if bubbles are present, this indicates a leak.
During charging, check for any flowing electrolyte. If present, it is caused by excess electrolyte and should be drained.
Case 05: Battery Electrolyte Freezing
Fault Symptoms:
The battery electrolyte freezes in severe winter conditions.
Troubleshooting:
During severe winter conditions, battery electrolyte may sometimes freeze. The main causes are: ① Excessive loss of sulfuric acid in the electrolyte during use; topping off with distilled water alone results in an electrolyte density that does not meet requirements, causing freezing; ② Excessive discharge of the battery, causing the electrolyte to freeze due to reduced density and a higher freezing point; ③ When distilled water is added, it fails to mix with the electrolyte in a timely manner, causing localized areas of the electrolyte to become too cold and freeze.
To prevent the above situations, observe the following precautions during use:
a. Regularly check the electrolyte density (charge the battery when the density falls below 1.20 g/cm3); if it does not meet requirements, adjust it promptly.
b. If the lights are dimmer than usual, the vehicle has difficulty starting, or the discharge exceeds 25% in winter or 50% in summer, recharge the battery promptly.
c. Add distilled water before charging; after adding it, charge the battery promptly to ensure rapid mixing with the sulfuric acid.
d. When the ambient temperature falls below -30°C, remove the battery and store it indoors.
Case 06: Battery Plate Sulfation
Fault Symptoms:
The battery plates are sulfated.
Troubleshooting:
Plate sulfation, also known as sulfidation, refers to a condition where, due to prolonged undercharging or a long period without recharging after discharge, the battery plates develop a white, hard, coarse-grained lead sulfate that is difficult to reduce and recrystallize, and which is very difficult to convert back into active material during charging.
Symptoms of plate sulfation include: failure to start the motor after unlocking the power switch; premature bubbling during charging, with electrolyte density failing to reach the specified value and temperature remaining high; during discharge or capacity testing, the battery capacity is significantly reduced, the terminal voltage drops rapidly, and the electrolyte density is below normal; the positive plate appears light brown (or white in some cases), the negative plate turns grayish-white, and the plate surface hardens into a gritty texture.
The main causes of this fault are: ① excessive evaporation of distilled water or failure to replenish it promptly following accidental leakage; ② impure electrolyte; ③ prolonged undercharging of the battery.
When a battery becomes sulfated, it should be repaired based on the severity of the sulfation. The specific repair methods are as follows:
(1) Treatment of slightly sulfated batteries: For this type of sulfation, the overcharge method can be used. Apply a continuous overcharge using the charging current from the second stage of the initial charging process. Once the electrolyte produces a large amount of bubbles and the specific gravity reaches 1.28 g/cm³ and no longer rises, the battery is ready for use.
It is best to overcharge individual sulfated batteries separately to eliminate the sulfation.
(2) Batteries with Severe Sulfation: To treat this type of sulfation, use the low-current overcharge method. Discharge the battery at a 10-hour discharge rate until it reaches the cut-off voltage, then drain the electrolyte and add distilled water. Charge continuously using the charging current from the second stage of the initial charge. Once the electrolyte density rises to approximately 1.15 g/cm3, discharge the battery again at a 10-hour discharge rate until it reaches the cut-off voltage. Next, recharge the battery using the original charging current until the specific gravity of the electrolyte stops rising. Then, adjust the specific gravity to 1.28 g/cm³, and discharge the battery at a 10-hour discharge rate until the cut-off voltage is reached. If the battery capacity reaches 80% of its rated capacity, it is ready for use. If the capacity is still insufficient, repeat the process until the battery capacity meets the required standard.
(3) Treatment of Severely Sulfated Batteries. For this type of sulfation, the water treatment method—specifically, the equalization charging method—can be used. First, fully charge the battery, then discharge it for 10 hours until the voltage of each cell reaches 1.8 V. Drain the electrolyte, immediately add distilled water, and let it stand for 1–2 hours, then charge the battery at half the charging current used in the second stage of the initial charge. When the specific gravity reaches 1.12 g/cm3, reduce the current by one-fifth and continue charging. When a large number of bubbles appear at the positive and negative terminals and the electrolyte density stops rising, stop charging and discharge the battery for 1.5–2 hours at a current equal to one-fifth of the 10-hour discharge rate. Repeat this process until the battery electrolyte produces sufficient bubbles, the plates return to normal, and the capacity reaches 80% of the rated capacity—at which point the battery is ready for use.
This charging method is not suitable for maintenance-free batteries.
If the battery cannot be restored after the above procedures, it is damaged and should be replaced with a new one.
Case 07: Battery Active Material Shedding
Fault Symptoms:
The battery active material sheds from the plates.
Troubleshooting:
Premature or excessive shedding of battery active material results in reduced battery capacity, or even complete loss of functionality, as well as cloudy electrolyte and excessive sediment. The main causes of this failure are: ① Electrolyte that does not meet quality standards; ② Excessively frequent charging and discharging, or overcharging and overdischarging; ③ Excessively high electrolyte temperature during charging; ④ Excessively high discharge current; ⑤ Excessively high initial charging current; ⑥ Excessively high current at the end of the charging cycle, etc.
Troubleshooting can be performed based on the various causes of failure listed above.
(1) Excessive Initial Charging Current: The reduction of active material on the battery plates begins at the grid, which has the best electrical conductivity. If the current is too high at the start of charging, lead sulfate is rapidly reduced at this location, while lead sulfate farther away cannot undergo a chemical reaction. The internally reduced lead sulfate has poor adhesion, causing the active material to flake off.
(2) Excessive current during the final stage of charging: An excessively high charging current produces a large number of bubbles that violently impact the plate surface, causing large amounts of the already-reduced lead dioxide to detach.
(3) Frequent overcharging: Although the overcharging current is not large, the lead sulfate on the plates has been completely reduced to lead dioxide and lead, and the entire charging current is consumed by the electrolyte. Although the resulting bubbles are not numerous, they still impact the plate surface, causing the active material to fall off.
(4) Excessive Discharge Current: When the discharge current is too high, the chemical reaction becomes violent, causing the plates to warp and resulting in the detachment of the active material.
The shedding of active material can cause a short circuit in the plates, leading to self-discharge of the battery. The battery must be disassembled and repaired; in mild cases, the deposits are removed, while in severe cases, the battery must be scrapped and replaced.
Case 08: Excessively Rapid Self-Discharge of a Battery
Fault Symptoms:
The battery self-discharges excessively fast.
Troubleshooting:
Battery self-discharge refers to the phenomenon where a fully charged battery gradually loses its charge while not in use. A daily loss of 1% to 2% of the battery’s capacity is generally considered normal; if this value is exceeded, it constitutes abnormal self-discharge.
The main causes of battery self-discharge include the following:
a. Impurities in the battery plate material or electrolyte create a potential difference between the impurities themselves or between the impurities and the plates, causing a current to flow in a closed, localized area of the battery and leading to over-discharge.
b. Electrolyte or water on the battery cover causes a short circuit between the positive and negative plates during charging, resulting in self-discharge.
c. Active material on the battery plates falls off, causing a short circuit between the plates and resulting in self-discharge.
d. The battery separators are cracked, causing a local short circuit between the battery plates.
e. When an electric bicycle is stored for a long period, the sulfuric acid in the battery’s electrolyte will gradually settle, resulting in lower density at the top and higher density at the bottom, which can also cause the battery to self-discharge.
f. The battery is of substandard quality.
To minimize self-discharge, the electrolyte must be kept pure during production, and the battery top cover should be kept clean during use; when cleaning the exterior of the battery, prevent dirty water from entering the interior; charge the battery frequently during storage to ensure the purity of the electrolyte; if the electrolyte is impure, discharge the battery at a current equal to 1⁄10 of its rated capacity until the voltage of a single cell reaches 1.7V, then pour out the electrolyte, rinse thoroughly with distilled water, and recharge using pure electrolyte.
If the battery separators or plates are damaged, they should be repaired or replaced promptly.
Case 09: Battery Short Circuit
Fault Symptoms:
The battery has an internal short circuit or a single-cell short circuit.
Troubleshooting:
Battery short circuits can be classified into two types: internal short circuits and short circuits in individual cells.
(1) Internal Battery Short Circuit: An internal battery short circuit refers to a condition where the positive and negative plates come into direct contact or are bridged by other conductive materials, causing a short circuit.
Symptoms include: ① Insufficient capacity, with the voltage remaining below normal even after charging; ② Very low terminal voltage during charging, even approaching zero; ③ Little or no bubbling toward the end of charging; ④ During charging, the electrolyte temperature rises rapidly, while the specific gravity rises slowly or not at all; ⑤ The battery’s open-circuit voltage is low, and it drops prematurely to the cut-off voltage during discharge; ⑥ Severe self-discharge.
The primary causes of this failure are: damaged separators, impure electrolyte, warped plates, crystallization of impurities inside the battery, severe shedding of active material from the plates, or internal short circuits caused by debris accumulated at the bottom of the battery cells.
Remove the battery for inspection; replace the separators as needed, remove deposits and conductive materials, and scrap the battery if the damage is severe.
(2) Symptoms of a short circuit in a single battery cell include the battery suddenly losing its starting capability, or even electrolyte spraying out from the short-circuited cell during starting. After a single cell short-circuits, the battery cannot output a strong current; simultaneously, high temperatures are generated at the short-circuit point, causing the electrolyte to heat up rapidly and spray out.
The main causes of this fault are: ① active material shedding; ② electrolyte containing impurities.
The specific troubleshooting methods are as follows:
During inspection, use a thin wire to create a spark between the positive and negative terminals of each cell. Any cell that produces no spark or only a weak spark is the short-circuited cell.
In an emergency, use a thick wire to short-circuit the positive and negative terminals of the short-circuited cell, thereby disabling it. When temperatures are low, electric bicycles may be difficult to start.
A short-circuited battery should be removed and repaired promptly; in severe cases, it should be scrapped.
Case 10: Battery Fails to Hold a Charge After Being Stored for a Period of Time
Fault Symptoms:
The battery fails to hold a charge after being stored for a period of time.
Troubleshooting:
If the battery fails to hold a charge after being stored for a period of time, first check whether the power switch is turned off. If the switch is not turned off, the controller, instrument panel, and other components will remain active, causing a small discharge current of 30–150 mA. This will completely discharge the battery—or even cause over-discharge—within 1 to 4 weeks.
Next, check whether the insulation in the electric bicycle’s power supply area is intact. Connect a multimeter set to the mA range in series with the battery circuit, turn off the power switch, and check for any small current flow.
Finally, check whether the battery terminal voltages are consistent and whether there is excessive self-discharge.
Under normal circumstances, a battery should be recharged once every two months during storage to prevent self-discharge from affecting its performance.
Case 11: Rapid Voltage Drop in a Newly Installed Electric Bicycle Battery During Start-up
Fault Symptoms:
The voltage of a newly installed battery drops rapidly during start-up.
Troubleshooting:
The troubleshooting procedure for a rapidly dropping voltage in a newly installed battery during start-up is as follows:
a. First, check whether the voltage matches the battery capacity, as shown in Table 1. If the relationship between the voltage displayed on the meter and the battery capacity does not meet the requirements, the battery is substandard and should be replaced by the manufacturer.
Table 1: Correspondence Between 2-Hour Discharge Voltage and Capacity for Batteries (12V Batteries)
| Capacity (%) | 100 | 90 | 80 | 70 | 60 | 50 | 40 | 30 | 20 | 10 | 0 |
| Voltage/V | 12.66 | 12.60 | 12.52 | 12.43 | 12.30 | 12.13 | 11.94 | 11.74 | 11.43 | 11.18 | 10.50 |
b. Check whether the battery connections are secure and reliable, and whether there are any short circuits; if so, take corrective action.
c. Check whether the starting and operating currents of the electric bicycle are too high. If they are (starting current above 15A, operating current above 6A), adjust the current limit setting on the controller or inspect and repair the motor.
d. Check whether the battery capacity is low. If it is low, charge and discharge the battery.
Case 12: Battery Will Not Charge or Is Undercharged
Fault Symptoms:
The battery will not charge or is undercharged.
Troubleshooting:
The troubleshooting steps for a battery that will not charge or is undercharged are as follows:
a. Check the battery’s service life. If the battery has reached the end of its service life, repair or replace it.
b. Check the fuse. If the fuse tube inside the battery has blown, replace the fuse tube. If there is poor contact between the fuse tube and the fuse holder, ensure proper contact or replace the fuse tube.
c. Inspect the charging circuit. Check whether the connections in the charging circuit are secure, whether the wires and plugs make good contact, whether there is arcing at the sockets and plugs, and whether there is any wire damage or breaks. If any abnormalities are found, secure the connections in the charging circuit or solder them firmly.
d. Inspect the charger. Verify that the charger’s charging parameters meet the requirements. Specifically, the initial charging current should be 1.6–5 A per cell; the maximum charging voltage should reach 14.6–14.8 V per cell; the float-charge conversion current should reach 0.3–0.4 A per cell; and the float-charge voltage should reach 13.8–14.1 V per cell. If the charger is malfunctioning, replace it. Replace the charger if it has no output voltage or low output voltage, or if the charger’s indicator light is malfunctioning and causing a false “full charge” indication.
e. Inspect the battery. Check whether the battery is dried out internally. If so, top off with distilled water or dilute sulfuric acid with a specific gravity of 1.05 to perform a maintenance charge and discharge cycle to restore the battery’s capacity.
When performing a maintenance charge on a dried-out battery after adding fluid, limit the maximum current to 1.8 A and charge for 10–15 hours; the voltage of all three batteries should be above 13.4 V. If the voltage difference between batteries exceeds 0.3 V, this indicates that the batteries have developed asynchronous, irreversible sulfation. If, during charging, the voltage rises particularly quickly and the voltage of certain individual cells is exceptionally high, while during discharge the battery voltage drops particularly rapidly and the battery holds little or no charge, this indicates that irreversible sulfation has occurred on the battery plates; for batteries exhibiting irreversible sulfation, the entire battery pack must be replaced or undergo desulfation treatment.
If there is no current display or internal sparking occurs within the battery, this indicates an open circuit. The primary causes include damage to the terminals during assembly—such as cracks or poor solder joints—or accidental leakage of acid into the lead solder joints during acid filling, causing corrosion and resulting in an open circuit. Repairs should be made based on the specific cause of the open circuit.
Case 13: Battery Charges for Less Than 1 Hour; Charger’s Green Light Turns On Indicating a Full Charge, but the Battery Runs Out of Power as Soon as It Is Used
Fault Symptoms:
The battery charges for less than 1 hour; the charger’s green light turns on indicating a full charge, but the battery runs out of power as soon as it is used.
Troubleshooting:
The primary causes of this fault are low charger voltage or a battery that has entered its end-of-life phase.
During charging, the charger determines whether the battery is fully charged by monitoring the voltage across its terminals. When the charger indicates a full charge, use a multimeter to measure the voltage across the battery terminals to determine whether the issue lies with the battery or the charger. If the voltage has already reached the fully charged level at this point, it indicates a battery fault. Otherwise, the charger is faulty.
If the battery is faulty, it indicates a reduction in battery capacity, and further inspection is required.
The specific troubleshooting steps are as follows:
a. Check the battery’s capacity. First, fully charge the battery, then discharge it at a current of 1.7A. Stop discharging when the battery voltage drops to 10.6V. Multiply the number of discharge hours by 1.7A to determine the battery’s capacity.
b. Check the battery electrolyte. Open the plastic cover on top of the battery, remove the rubber cap, and check the electrolyte level through the small hole. If the level is low, add 4–6 mL of distilled water to each cell until the plates are fully submerged. Then charge the battery with a 1.7A current for several hours. When the battery voltage rises to 14.3V, discharge it again at a current of 1.7A. Calculate the battery’s capacity based on the discharge time. If the capacity still does not increase, it indicates that the battery has sulfated and should undergo desulfation treatment.
The specific method for desulfation is as follows:
First, add distilled water to the battery until the electrolyte does not leak out when the battery is turned upside down. After adding the water, charge the battery with a 1A current until the voltage reaches 14.3V, and maintain this voltage for several hours. Then, use a syringe to extract as much electrolyte as possible from the battery (collecting it in the same container each time for later use). Repeat the process—adding distilled water, charging, and extracting—several times to allow the white sulfuric acid inside the battery to convert naturally, thereby achieving desulfation.
c. Heat and concentrate each batch of extracted electrolyte until it is reduced to less than 50 mL. Then, divide the concentrated electrolyte equally among six small batteries. Charge and discharge the batteries, and calculate their capacity. If the battery capacity reaches 90% of the rated capacity, this indicates that the battery has been restored to normal.
If the extracted electrolyte appears brown and relatively cloudy, it indicates that the battery’s active material has been depleted, the battery’s service life has ended, and it is no longer worth repairing.
Case 14: Emergency Repairs for Battery Damage While Riding
Fault Symptoms:
The battery is damaged while riding and requires emergency repair.
Troubleshooting:
While riding an electric bicycle, issues such as a battery circuit break, broken terminals, or a cracked battery casing may occasionally occur; in such cases, several emergency repair methods can be employed.
(1) Battery open circuits can be either internal or external. For an internal open circuit, attach a wire to the positive terminal and test each cell individually by checking for a spark; if no spark is present, that is the location of the open circuit. As a temporary fix, connect the cells with a thick wire to get the electric bicycle running again.
For an external break, you can directly identify which cell is faulty by inspection; the temporary fix is the same as for an internal break—simply connect the cells with a thick wire.
(2) If a battery terminal is snapped off flush with the bakelite casing, that cell can be bypassed. For example, if the negative terminal is broken, move the ground wire to the other terminal in the same cell, secure it tightly, and the vehicle will start. If starting is difficult, connect the ground wire to the broken terminal and press it firmly into place. After the motor starts, use a wire to connect the ground wire to the other terminal in the same cell as the broken one.
(3) If the battery case cracks due to loose mounting or other causes, first seal the leak promptly. Tilt the battery toward the side that is not leaking, wipe up any spilled electrolyte, and apply asphalt to the battery cap, making sure to heat the asphalt over the vent pipe before use. If all the electrolyte has leaked out, you may temporarily refill it with plain water as a stopgap measure; let it sit for 20 seconds before restarting the motor.
Replace the battery with a new one to resolve the issue.
Case 15: Battery Replacement
Fault Symptoms:
The battery needs to be replaced.
Troubleshooting:
(1) Principles for Battery Replacement: When a battery experiences a short circuit, an open circuit, irreversible plate sulfation (especially in severe cases), severe deformation, significant electrolyte leakage (excluding leakage from the safety valve), or severe active material shedding or softening (electrolyte has turned black), the battery’s service life has come to a normal end.
The following are typical signs that a battery’s service life has ended:
a. When the battery’s actual discharge capacity falls below approximately 60% of its rated capacity, performance will decline significantly.
b. The battery’s positive plate is severely softened, internal resistance increases, active material falls off, impurities leach out, heat generation increases during charging, the safety valve opens, and the electrolyte turns black.
c. Battery performance becomes unstable and declines significantly.
(2) Precautions for Replacing Batteries
a. Partial replacement. New batteries must be identical in type, specifications, and model to the original batteries. Except for voltage, the capacity, power, and charging system must match those of the original batteries. Furthermore, the original battery pack should be in the early stages of its service life and should not be in the late stages. Replacing individual cells when the entire battery pack is in the late stages of its service life is pointless; it is best to wait until the entire battery pack has reached the end of its service life before replacing all cells. Whether replacing the entire pack or individual cells, the new batteries must be compatible with the original charger and controller.
b. When replacing the entire battery pack and changing the battery type, the characteristics of the controller and charger must align with those of the new batteries.
c. Currently, major domestic manufacturers use standardized battery dimensions; however, due to variations in control systems and chargers, it is best to select batteries from the original brand or those recommended by the vehicle manufacturer when replacing batteries.
(3) Battery Replacement Procedure: When installing or removing the battery box, first disengage the power lock, then remove the key.
a. Remove the battery. First, remove the battery together with the battery box and place it on a workbench, then remove the locking screws and other fasteners. Carefully open the battery box, use a 50W soldering iron to desolder the battery cables from the terminals, and immediately wrap the terminals with electrical tape to prevent short circuits; when soldering the cables between batteries, solder one connector first and hold it in place while soldering the other. After soldering, immediately place the cables in their designated locations to prevent them from causing a short circuit.
Some batteries are secured to the battery case with adhesives (usually self-adhesive tape) during installation, requiring you to pull firmly to remove them (but do not use excessive force). If removal is difficult, you may gently heat the battery or use a solvent such as alcohol to dissolve the adhesive before removing the battery. Finally, thoroughly remove any residual gaskets or adhesive to prepare for installing the new battery.
b. Inspection. Check the quality of all connections, as well as the fuse holders, charging sockets, and the battery terminals to ensure they are making normal and reliable contact, tighten all fasteners, and verify the reliability of the connections.
c. Battery Installation. Batteries are generally connected in series, meaning the positive terminal of one battery is connected to the negative terminal of another, linking all batteries together. Finally, connect the remaining positive and negative terminals to the corresponding terminals on the electric bicycle.
When installing or replacing a battery, verify the polarity of the battery terminals. Do not replace a battery with one that has terminals in a different orientation, as this can cause incorrect connections, leading to battery damage or even the burning of connecting wires, other electrical components, and a vehicle fire.
Electric bicycles are generally equipped with a battery compartment, which comes in three types based on installation location: slanted, rear-insertion, and chassis-mounted. A battery compartment generally consists of a base tray, a top cover, battery contacts, a charging socket, and a power lock switch. The base tray and top cover snap together and are secured with self-tapping screws or bolts.
When a replacement battery is first put into operation, carefully monitor the operation of the charger and controller. If any abnormalities are detected, identify the cause and address it promptly.
Case 16: Reversed Battery Polarity Causes a Brushed Electric Bicycle Motor to Run Uncontrolled and Reverse Direction
Fault Symptoms:
The battery polarity is reversed, causing the brushed motor to run uncontrolled and in reverse.
Troubleshooting:
A brushed electric bicycle experienced a runaway and reverse rotation fault. Analysis revealed that when the positive and negative terminals of the brushed motor were connected in reverse, the motor could rotate normally but would do so in the opposite direction.
Upon questioning the owner, it was learned that the wiring inside the vehicle’s battery box had been reconnected by the owner, and the motor malfunctioned immediately after the reconnection.
Upon inspection, the controller was found to be damaged. The vehicle’s brushed electric motor was the original unit, and there was no sign of reversed wiring on the motor itself. Testing revealed that the positive and negative terminals on the motor wires were reversed, as were the positive and negative terminals on the controller’s power cables and the power cable connections inside the battery compartment. The charger port was also connected in the opposite direction relative to the battery compartment. Upon opening the battery compartment, it was found that the positive and negative output terminals inside were reversed. After reconnecting the positive and negative terminals and replacing the controller, a test ride confirmed that the fault had been resolved.
Case 17: Battery Explosion
Fault Symptoms:
The battery explodes during charging.
Troubleshooting:
An electric bicycle had been owned for less than half a year, with an average daily ride distance of less than 20 km. No one had performed any maintenance on the bike. It was estimated that the battery itself was not faulty, but the possibility of a clogged battery vent could not be ruled out. Ultimately, the owner reported that after losing the bike’s charger, they borrowed a neighbor’s charger and began charging at 7:00 PM; the battery exploded by midnight.
The following factors can cause a battery to explode during charging:
a. Blocked battery vent holes.
b. Internal short circuit or sulfation in individual battery cells.
c. Mismatch between the charger and the battery, resulting in excessive charging current.
Based on the observed symptoms, it can be determined that the battery explosion was caused by a mismatch between the charger and the battery. Upon removing the exploded battery and inspecting it, it was found that many of the plates had been shattered by vibration, making repair impossible; the battery must be replaced.
Case 18: Battery Charges Quickly but Has Short Riding Range After Long Period of Inactivity
Fault Symptoms:
The battery charges quickly but has a short riding range after a long period of inactivity.
Troubleshooting:
A woman had been away on a business trip for over eight months, during which time her electric bicycle had not been ridden. When she returned the day before yesterday and charged the electric bicycle, the charger indicated a full charge in less than one hour. However, after riding less than 2 km, the battery ran out of power.
Analysis of the above symptoms indicates that prolonged disuse caused sulfation of the battery plates, resulting in reduced capacity; desulfation treatment is required.
First, discharge the battery at a 10-hour rate until the cut-off voltage is reached, then drain the electrolyte and refill with distilled water. Then, charge the battery continuously at a 7.5-hour rate until the specific gravity of the electrolyte rises to approximately 1.29, after which discharge it again at a 10-hour rate until the cut-off voltage is reached. Repeat this process twice; the battery capacity will reach 80% of its rated capacity, and the fault will be resolved.
Case 19: Significantly Reduced Range After a Full Charge
Fault Symptoms:
The range is significantly reduced after a full charge.
Troubleshooting:
A certain electric bicycle reached a full charge in less than 3 hours, but its range has become progressively shorter and is now unusable.
The battery was removed for charging; within 30 minutes, it became excessively hot, so charging was stopped. The battery’s filling port was removed, and when attempting to drain the electrolyte, no fluid flowed out—indicating the electrolyte had dried up. After adding electrolyte, charging resumed; the battery was fully charged after 4 hours but still had poor endurance, indicating reduced battery capacity. Desulfation charging was then performed.
First, drain the electrolyte and rinse the plates twice with distilled water, then top off with distilled water. Next, charge the battery at a 20-hour rate. When the specific gravity of the electrolyte rises to 1.15, drain the electrolyte and replace it with distilled water until the specific gravity stops increasing.
Finally, perform a discharge at a 10-hour rate until the battery is fully discharged. Repeat this process three times, and the battery capacity will be restored to 80% of its rated capacity.
After charging, the range exceeds 20 km.
Case 20: Crack in the Battery Case
Fault Symptoms:
The battery case is cracked.
Troubleshooting:
While charging the electric bicycle, water was observed dripping onto the ground; inspection revealed a crack in the battery case.
Place the filled battery in a large tank of sulfuric acid. Using a 220V power source, connect two probes to a light bulb so that the battery’s internal and external fluids form a series circuit. If the light turns on as soon as the circuit is closed, this indicates a crack in the battery casing. If no crack is present, the light will not turn on.
Before repair, scrub the battery casing with a baking soda solution to remove all dirt. Then, use a scraper to cut a V-shaped groove along the crack on the outer surface of the casing, with a depth of 2⁄3 of the casing wall thickness. Next, use a file to roughen the edges of the groove. Then thoroughly clean the groove with acetone or gasoline with an octane rating of 80 or higher. Finally, repair the crack with an adhesive.
Another method involves using an epoxy resin adhesive. The procedure is as follows: use an oxyacetylene torch or other heater to locally heat the crack area until it softens; use a putty knife to cut a V-shape into the crack; use a blade to pack the pre-mixed epoxy resin adhesive into the V-shaped groove and smooth it out; then cover it with paper. After half an hour, place it in a drying room at 40–60°C for 2–3 hours; or, after it has cured naturally indoors, remove the paper, file the surface smooth, and the repair is complete.
Case 21: Battery Power Drains Quickly Shortly After a Full Charge
Fault Symptoms:
The battery power drains quickly shortly after a full charge.
Troubleshooting:
After prolonged use, the battery of an electric bicycle will quickly run out of power shortly after being fully charged, making it difficult to start the bike; when the lights are on, the illumination is dim.
There are two main causes for the above symptoms:
a. Insufficient electrolyte.
b. Severe loss of active material.
Checking the Battery Charge: When the electric bicycle is difficult to start or the electric horn does not sound, check the battery charge. To do this, remove the battery and check whether the electrolyte level is between the upper and lower markings on the case. Upon inspection, it was found that the electrolyte level on this vehicle was below the lower mark. After topping off with distilled water and conducting a charging and riding test, the fault was resolved.
Case 22: Electric Bicycle Has No Power
Fault Symptoms:
The electric bicycle has no power.
Troubleshooting:
The main causes of a complete power loss in an electric bicycle are: ① a blown fuse; ② a loose connector; ③ a faulty power switch.
The specific troubleshooting steps are as follows:
a. Check the fuse. Use a multimeter to measure the battery terminal voltage. If voltage is present, the system is functioning normally; if no voltage is present, this indicates a blown fuse, a loose battery connector, or a faulty battery, in which case the defective component should be replaced.
b. Check the connectors. Inspect the power lock connectors; if loose, secure them firmly or replace them.
c. Inspect the power lock.
① Use a multimeter to measure the voltage across the power lock’s input and output terminals. If a normal voltage is present, the power lock is functioning properly; if no voltage is present (while the battery is supplying voltage), the power lock is faulty and should be repaired or replaced.
② Turn on the power switch and use a multimeter to measure the resistance between the power lock’s input and output terminals. If the resistance reading is zero, the power lock is functioning properly; if the resistance reading is ∞, the power switch is faulty and should be replaced.
③ Check the connections of the power lock leads or contact leads. If there is an open circuit or poor contact at the connectors, rewire the circuit and adjust the connectors.
Note: When replacing a fuse, you must use a fuse of the same specification. Never substitute it with conductors such as copper wire or iron wire, as this may easily damage the controller or motor.